Difference between revisions of "XPicoWiFi/ManufacturingConfiguration"
| Line 84: | Line 84: | ||
** Sleep for 30 seconds | ** Sleep for 30 seconds | ||
** Disconnect | ** Disconnect | ||
| + | |||
| + | Make sure that in the same directory as the batch file you have a build.xml file with the configuration changes that you would like to see from the default configuration, and also the filesystem files that you would like to upload. Change the curl commands for the filesystem upload as necessary for your files. | ||
Revision as of 16:27, 27 March 2015
Introduction
Your product will probably have settings on the xPico Wi-Fi that are different from the factory defaults. At a minimum, you will want to change some configuration parameter. If using the built-in Web Server for custom web pages, you will also want to upload the HTML pages to the xPico Wi-Fi's filesystem.
There are multiple ways that this can be achieved. If you have an attached microcontroller, the MCU can configure the xPico Wi-Fi at run-time via the serial port. However, if you want to simplify your MCU's code to just handle data communication and not have to do the one-time configuration of the xPico Wi-Fi, you can configure it at manufacturing.
Using the Soft Access Point
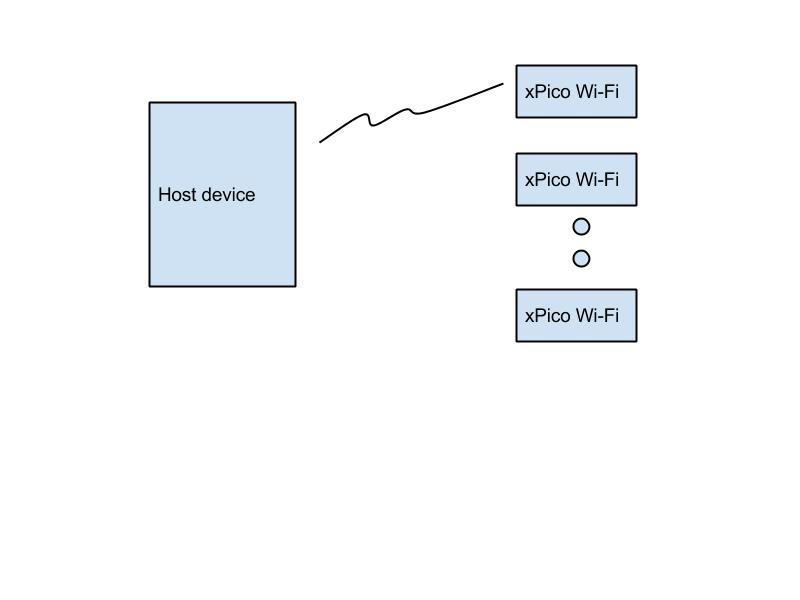
Using this scheme, a Host device on the Manufacturing floor (which can be a Windows PC, or an Android device) is always scanning on Wi-Fi to find the SSID of the default Soft AP of the xPico Wi-Fi. When it finds it, it will connect to the device, and then use the WebAPI to upload configuration and the WebDAV filesystem API to upload filesystem files.
From a Windows host
Create a file named c:\profiles\test.xml with the following contents:
<?xml version="1.0" encoding="US-ASCII"?>
<WLANProfile xmlns="http://www.microsoft.com/networking/WLAN/profile/v1">
    <name>testXPW</name>
    <SSIDConfig>
        <SSID>
            <name>XpicoWiFi_123456</name>
        </SSID>
    </SSIDConfig>
    <connectionType>ESS</connectionType>
    <connectionMode>auto</connectionMode>
    <autoSwitch>false</autoSwitch>
    <MSM>
        <security>
            <authEncryption>
                <authentication>WPA2PSK</authentication>
                <encryption>AES</encryption>
                <useOneX>false</useOneX>
            </authEncryption>
	    <sharedKey>
		<keyType>passPhrase</keyType>
		<protected>false</protected>
		<keyMaterial>XPICOWIFI</keyMaterial>
	    </sharedKey>
        </security>
    </MSM>
</WLANProfile>
Create a batch file that will be run as Administrator. Copy and paste the following code into the batch file:
@echo off
netsh wlan disconnect interface="Wireless Network Connection"
netsh wlan delete profile name=testXPW
netsh wlan add profile filename="c:\profiles\test.xml"
netsh wlan show networks > temp.out
del /F temp1.out
findstr /L XpicoWiFi_ temp.out > temp1.out
for /F "tokens=4" %%i in (temp1.out) do (
                netsh wlan set profileparameter name=testXPW SSIDname=%%i
rem        netsh wlan connect name=testXPW
rem        profile is set to "auto connect" so the above is not needed
                ping -n 10 192.168.0.1 > nul
rem
rem        do the curl configuration here
rem
                curl -u admin:PASSWORD http://192.168.0.1/import/config -X POST --form configrecord=@build.xml
                curl -u admin:PASSWORD http://192.168.0.1/fs/http -X MKCOL
                curl -u admin:PASSWORD http://192.168.0.1/fs/http/ -T test.html
                ping -n 30 192.168.0.1 > nul
                netsh wlan disconnect interface="Wireless Network Connection" >> log
)
@echo on
The pings are used for spending time, since there is no sleep command in the Windows shell.
The batch file does the following:
- Disconnects the wireless interface
- Deletes the profile that we are going to change from the Windows connection manager (just in case it's already in there)
- Adds the profile, which is based on the test.xml file
- Scans the network for available SSIDs
- Filters the scan list for SSIDs that start with 'XpicoWiFi'
- Loop for each SSID of the filtered list:
- Change the SSID of the Windows profile
- Automatically connect
- Attempt to ping for 10 seconds
- Use curl to upload the build.xml file which is your custom configuration
- Use curl to create the http directory
- Use curl to upload your test.html file into the http directory
- Sleep for 30 seconds
- Disconnect
Make sure that in the same directory as the batch file you have a build.xml file with the configuration changes that you would like to see from the default configuration, and also the filesystem files that you would like to upload. Change the curl commands for the filesystem upload as necessary for your files.
